
UIPickerView skin with transparent selection bar (aka "an hour or two of hell")
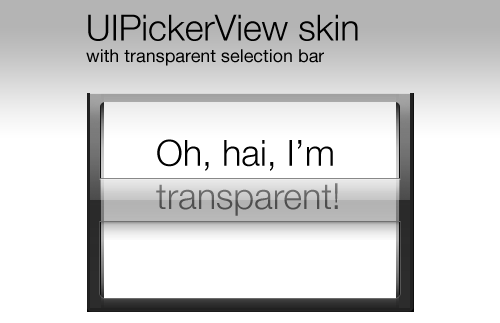
If you don't care for reading my rant at how I arrived at the solution, feel free to simply download the PSD of my UIPickerView skin with transparent selection bar (Photoshop CS3 format, .zip, 94KB) and customize it to your heart's delight and use it in your iPhone apps. Oh, and if I saved you some time, one way of thanking me is to feed my App Store habit with a tip.
(And before you leave, don't forget to check out the Introduction to iPhone App Development course I'm teaching in February in the UK.)
A UIPickerView by any other tint…
So when Apple created the UIPickerView, They decided in Their Infinite Wisdom that no developer would ever want to change its color… apart from the ones who built Apple's own Clock app, of course! (Check out the Timer tab for a gloriously greyscale picker.)
So how does a mere mortal alter the tint of a UIPickerView? Let me tell you… but first, do you have an hour or two to spare?
Hack it, baby!
The hack seems simple enough: Just grab the graphics from a screenshot of the simulator, tint them in Photoshop, then fake it by loading the new graphic into an UIImageView that you place on top of the component. That works for the border, but what about the selection bar?
The problem is that the selection bar graphic you grab is opaque and the selection bar needs to transparent.
Of course, you can just recreate the selection bar. But it would be damn hard to get it perfect.
What if there was a way to copy the opaque bar and recreate it exactly but with transparency?
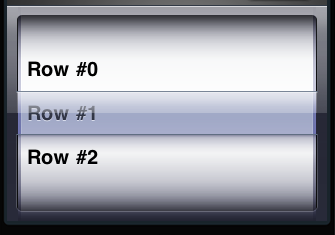
So, what if there was a way to go from this screen grab, which is 100% opaque:
To this:
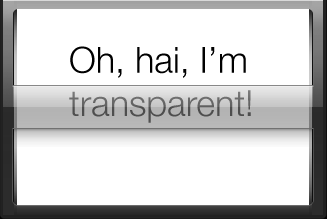
While recreating the selection bar exactly.
Well, you can, but it involves a bit of math and quite a bit of patience.
On Alpha blending and pushing pixels
So, when I tweeted asking if someone had an easy tool for doing what I wanted to do, Seb and Mario both responded with helpful suggestions. Mario's link to the Alpha compositing page on Wikipedia was especially useful as that's where I found the following formula for alpha blending:
The value of the resulting color when color Value₁ with an alpha value of α is drawn over an opaque background of color Value₀ is given by:
Value = (1-α)Value₀ + αValue₁
Of course, what I wanted was the opposite of this: I had the pre-blended color values of the selection bar (on a white background/matte) and I needed to know how I could match those colors if the pixels had an amount of transparency. In other words, I know Value (the pre-blended color value; the "resulting color"), I know the background color that it was blended with (Value₀) and I want to know Value₁ (the color) for any given α.
So, turning the equation around, we get:
Value₁ = ( Value - (1-α)Value₀ ) / α
Furthermore, in this case since the background color is white (i.e., 1.0 for all channels), it simplifies down to:
Value₁ = ( Value - 1 + α ) / α
So all that's left (!) is to go through all the pixel values in the opaque image and calculate the color values they'd have at opacity α.
To simplify things, I was trying to create a greyscale version of the bar, so the R, G, and B values were identical.
So, for example, given a grey reading with R=B=G=140 in Photoshop, I would translate that to a 0-1 color value by dividing by 255 and then use the resulting value in the equation. e.g., if I was trying to match the pixel at 50% opacity, I would get:
colorValue = 140/255 = 0.55
Value₁ = ( 0.55 - 1 + 0.5 ) / 0.5
Value₁ = 0.1
0.1 roughly translates to R=G=B=26 in Photoshop.
Here's what this looks like:
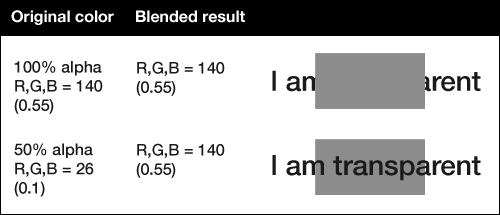
So we've managed to take an opaque grey and find the exact same color at 50% opacity when blended with a white background.
Applying it to the selection bar
I initially thought of writing a Photoshop script to iterate over the contents of a selection and create the version of it with transparency automatically. However, one look at the sample scripts that come with Photoshop made me run screaming.
Since the selection bar is a horizontal bar with simple straight gradients, it can be losslessly reduced to a one-pixel wide image. This means that I had about 61 pixels to sample manually, calculate the transparent color values for, and then recreate. I figured it would be simpler to do it manually then to learn the brain-frak that Photoshop scripting appears to be (even though it uses JavaScript – how could they complicate that so much? I blame a lack of good introductory instructional materials.)
So, I created a speadsheet in Numbers with the formula. Next, I proceeded to create a one-pixel grid over the selection bar using guides (since the grid in Photoshop is messed up), and then sampled the 61 pixels, one-by-one, copying the values to the spreadsheet.
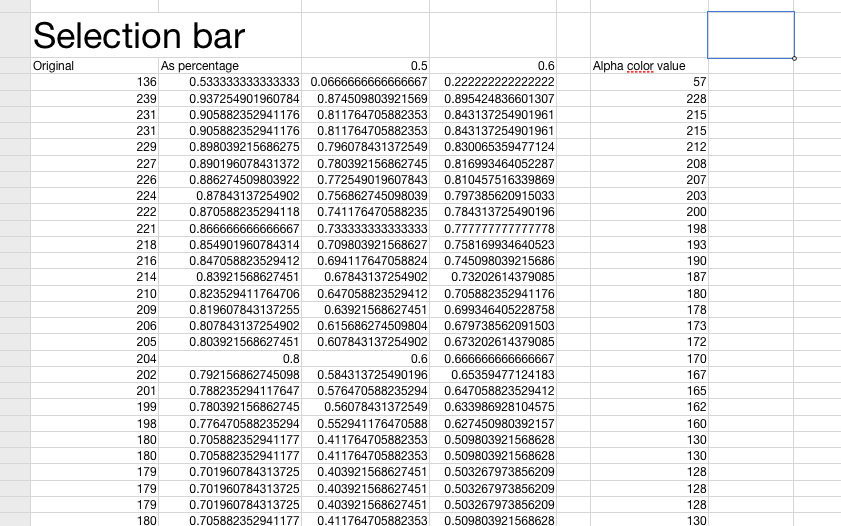
I then ran the formula on the pixel values both at 50% and 60% alpha.
The problem with this equation is that not every opaque value can be represented by a color value at any opacity. So you have to make sure that all your pixel values fall between 0 and 1. At 50%, a couple of the pixel values fell below zero so I decided to go with 60% opacity.
I then manually recreated the one-pixel selection bar, pixel-by-pixel using the pencil tool and the calculated pixel color values for the channels and finally set the opacity of the layer to 60%. Eh, voilà, I had my transparent selection bar.
A suggestion for graphics apps
If anyone from the Photoshop team is reading this, I'd love to see this as a feature in Photoshop. How cool would it be if I could select an opaque area of the image, specify an opacity and a matte color (e.g., default to the background color swatch) and get a transparent version that matches the source exactly?
Mario already started playing with something like this for Peacock, and posted a manual color matching filter.
So you don't have to…
So you don't have to go through all this yourself, why not download the PSD of the UIPickerView skin I made (Photoshop CS3 format, .zip, 94KB).
Enjoy, and I hope it saves you some time! (And if it does, feel free to say thank-you by contributing to Aral's App Store Addiction Fund.)
Finally, if you'd like to learn how to develop iPhone apps yourself, you could do far worse than to attend my Introduction to iPhone App Development course in February. It takes place in Brighton in the UK.
Comments
by The Evil Boss on 2010-01-11 20:34:24
by Aral on 2010-01-11 08:27:08
by Aral on 2010-01-11 21:53:24
by test on 2010-05-11 20:56:05
by hhamm on 2010-05-11 13:23:13
by Raj on 2010-06-02 06:32:43
by Nils Hayat on 2010-09-28 18:03:54
by Mike on 2010-11-01 10:08:44
by Aral on 2010-10-04 10:32:50
by Dan W. on 2011-09-22 18:24:43
by kalvin on 2011-12-14 15:24:59
by Herman on 2012-03-13 13:42:09